
 |
| Look at the cute puppy eyes.. aww |
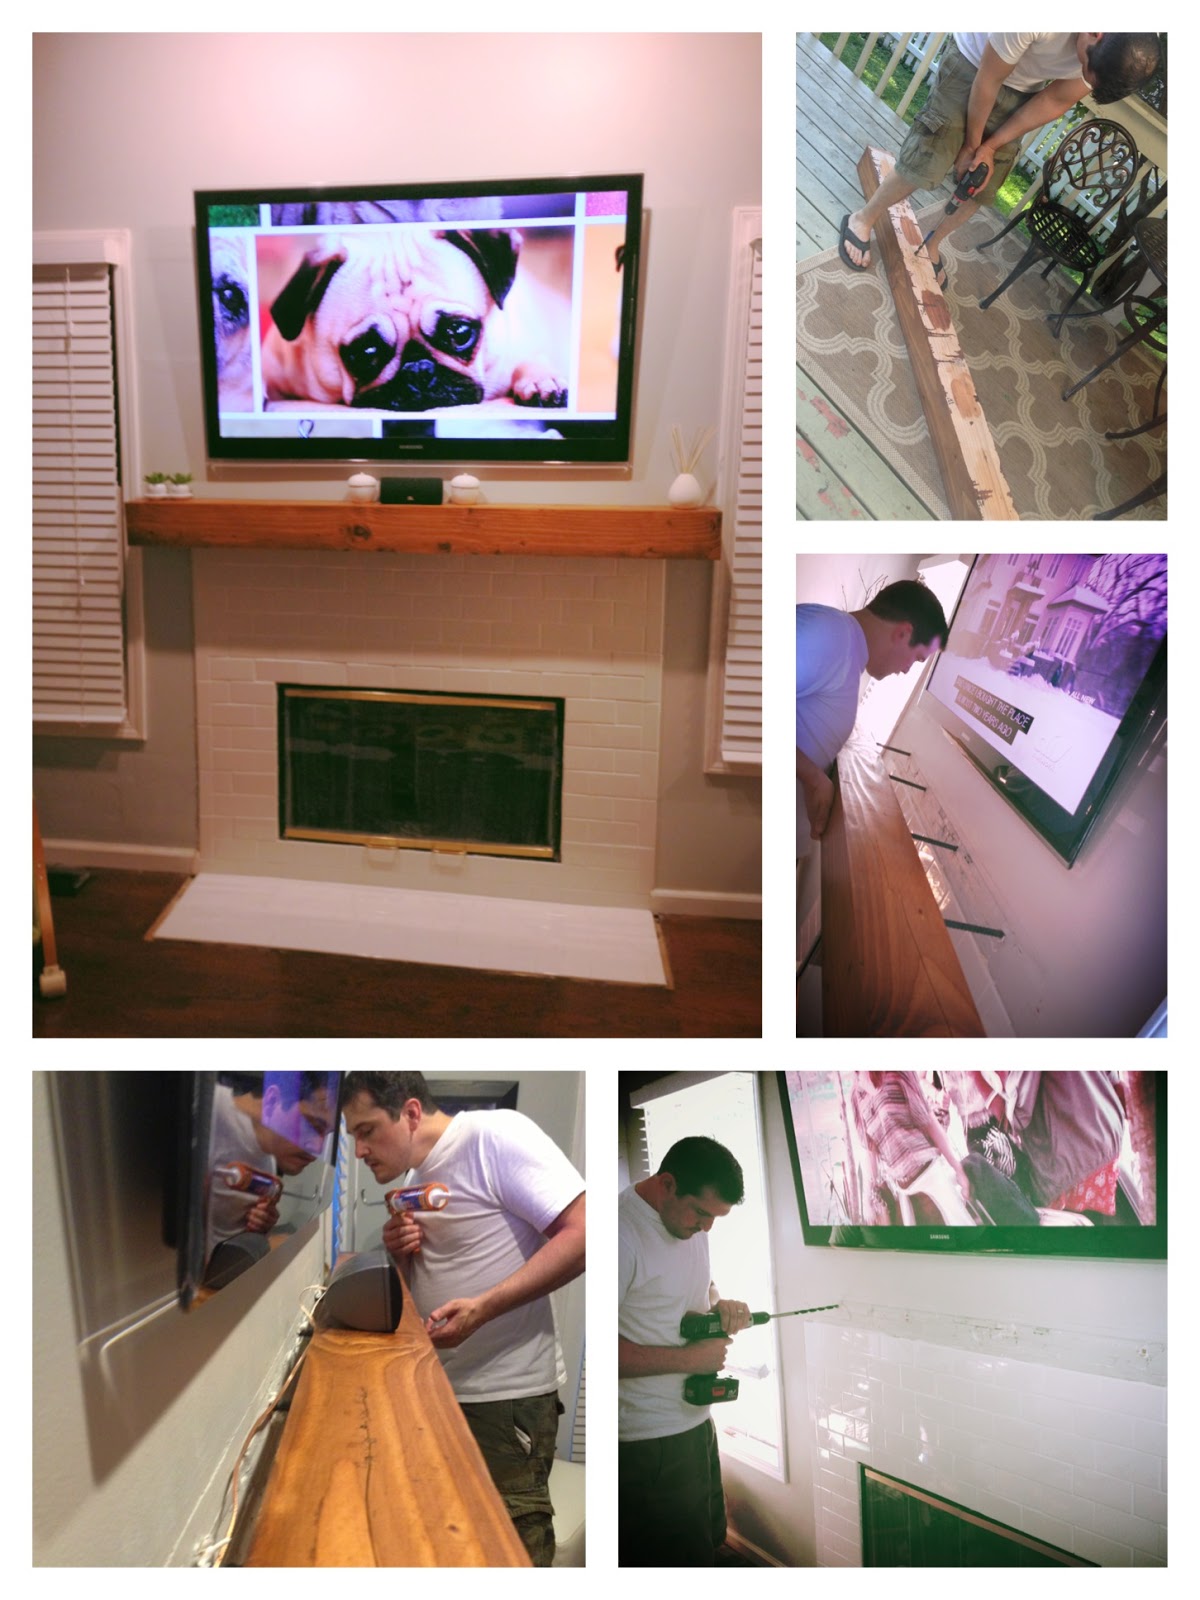
I should emphasize MAN in mantel, because there hasn't been a project so far that my husband, Steve, felt more manly about... but I digress..
 So after having to stare at one of these work in progress projects (left) for the last few months, we finally installed a nicely stained mantel beam above our fireplace -- the same fireplace with a subway surround that I sweated and toiled over, btw.
Of course, there was a series of projects before we could even really attempt to put it up ourselves (electrical, paint, and finding the right beam). We originally thought we'd go with a reclaimed barn wood from a seller we found on craigslist (apparently this guy bought a barn just south of Chicago and was selling all of the wood beams). Which would have been pretty cool actually, but in the end, we just went with old reliable Menard's and got a nice Douglas Fir beam from their lumber stock. Total convenience factor won out on our end.
Anyway, before we could even put it up, I should mention our re-tiling project as well. Although that project isn't quite as fresh in my memory anymore (I had to start the hearth before we even had the floors refinished), but the pictures kind of jog my memory. I should also mention that re-tiling the fireplace surround had to be done since the old tiles were pretty badly stained and cracked. And we were just so enamored over classic white subway tiles (i.e. our whole kitchen is in white subway tiles), that it only made sense to match it up.
Anyhoo, here are some "work in progress" photos...


Not only was this an easy enough project, but it was easy on the budget too (about $35 per 12.5 sq ft) and we mixed our own thin set (which I totally recommend over getting pre-mixed thinset, from experience). The project was simple enough that we were able to finish tiling the fireplace surround and the kitchen backsplash in a weekend #weekendwarriors. We did leave the grouting for another weekend, but I recommend mixing your own grout as well to get the consistency that you like (pre-mixed was so hard to work with, in my opinion.)
 |
| Classic white daltile 3"x6" Ceramic tiles (approx. $35 per 12.5 sq ft!) |
 |
| just say NO to Pre-Mixed anything.. |

Anyway, on to the MANtel.. We picked up a few stain samples (10 cents for a small packet at your local hardware store) and decided to go with a medium Golden Mahogany. Totally inspired by these rustic pinterest mantels below:


Then we pondered and thought long and hard about installing this over the fireplace. Naturally, I lost sleep over how the mantel would stay up and even had a few nightmares of everything just falling apart. In the end, we decided to go the rebar method and drilling through 4 studs on the wall. My inner skeptic was on alert, after all this beam was not light and I kept imagining every possible scenario where the wall caving in. But I had to trust my man, so off we went.

 |
| Rebars secured. You can even see our stain samples here. |
 Not only was this part tricky, it was also not fun. So as I helped my hubby hold up this super heavy beam while he hammered it in with a heavy duty mallet (I recommend cushioning your hold of the mantel with a pillow or blanket so you won't feel the stinging reverb everytime it was pounded in). Like I said, it wasn't fun. There were a few times we were both convinced that it wasn't going in at all, enough to discourage us. But after taking a break, we mustered up a bit more confidence and pounded away. Sure enough, after awhile, the rebar was finally getting through the stud and moving along. And bonus part, the hammering also gave the beam an old beaten up, maybe even hand hewn effect. Huzzah!
Before you know the mantel slid right in. And just before securing it completely against the wall, we just wanted to add some extra hold (for our peace of mind) and added construction grade adhesive to the wall and mantel.
 |
BAM, mantel is in!!
|
BEFORE:

AFTER:


I love it! (Also love that all the hanging wires from the mounted TV and speakers are hidden as well).
Aside from the kitchen, this is probably one of my favorite projects. Not only does it give the room a nice rustic look with a touch of modern, but I am super excited to hang up stockings over the fireplace over the fireplace (this is our first fireplace, after all)
Have you guys attempted installing a DIY beam as a mantel before? How was your experience?
No comments:
Post a Comment