Wednesday, January 30, 2013

Days 8,9,10: Cabin Fever

Ah, 3 days have gone by and not a peep from this absent blogger...  I have my excuses, of course -- I am on a tight deadline at work and our cable and internet in the new house is just finally getting connected, so I'm letting myself off the hook.

But now that I have a little bit of time, I'd like to do a quick post about how the house is slowly transforming.  I prefer to post daily during construction because it's kind of nice to look back and see all the changes.  I tend to have a shorter memory for exact details if I wait too long, but luckily for me (or unluckily as an anxious homeowner) changes have been on the light side with our contractors.  But that's not to say that we haven't been fixing up on our own too!

So as for the pros, it was business as usual continuing with finishing up drywall, mudding, taping, and correcting a few mistakes (as noted in my Day 6-7 post-- extending the soffits and half wall).  Very exciting to see things come closer to finish, but I've mostly stayed out of their way and let them work it out..

Leavin' it to the pros...
As for the rest of the house, this week we tried our hand at DIY and drywall for the very first time.  After paying close attention to the pros, Steve and I decided to start small and drywall the teeny tiny 4th bedroom/office upstairs.  Currently, its walls are decked out in wood paneling and felt a little too cabin-like for us.  It wasn't bad, but we were just not feeling it as this was not our style. So we pressed on...

BEFORE: Cute, but looked much
better in pictures than in real life.
OK.. so you'll see in the photos that the drywall is actually installed vertically instead of horizontally.  This is definitely a sore subject and our first DIY argument.  Yes, I've nagged and nagged Steve about putting them on the standard horizontal way (drywall horizontally would can be secured over more studs and will resist the laws of gravity by not bowing out due to its weight) but Steve, being as stubborn as he is, insisted that it's ok (is it?) and will have less cuts this way since the drywall was 8ft., almost the exact from floor to ceiling.  I guess we'll just have to see over time what happens. 

(almost) AFTER:


So lots of little pieces and vertical drywall later, the room is actually looking like an updated one.  Peter, our contractor, actually gave it a quick peek and gave us the approved ok (or he's just bailing Steve out). We already did some mudding, taping, and sanding (not pictured), so just waiting out another day to maybe even get started with paint!

We also did a little demo in the cedar-lined closet in the office.  Since this office is just above the kitchen and the vents were moved around in this room, we were able to get rid of this weird-o platform inside the closet (again, apologies for the lack of "before" photos).  You can almost imagine where it would have been, seeing that the nice cedar wall cutout forming a silhouette of what once was there.  We also discovered some more original wood inside the closet, although we're not quite sure yet what our plans are here (should we weave the flooring to match up with the rest of the room, etc.)  One other interesting discovery was that it looked like the original floors had a dark stain at some point of its hundred year existence.  How neat is that, especially since we'd like to refinish and stain almost a similar dark stain! (how 'bout that for accurate restoration)


Movin' on to other developments in the last few days, we also managed to get rid of our current queen sized master bedroom set in our old house (struck a deal with our future renters, so even less moving to boot!) and finally realized our lifelong dream of sleeping in a king-sized bed.  So we took the plunge and ordered a nice 14" King Sized Memory Foam mattress and a beautiful upholstered king platform bed online.  It's always a pretty big risk ordering your mattress on the "interwebs", especially since your mattress' whole purpose in life is to provide a person's good night's rest (a pretty big responsibility, don't you think?).   BUT we're young (kind of) and risky, so we went for it.  And our risk paid off in spades (the mattress at least, the platform bed is still in transit).  This has to be one of the most comfortable beds I've ever laid my tired body on. I've even already taken naps on it, even through loud construction, it's just that comfortable.  So like the many good reviews on Overstock, two thumbs up all around in this household (hubby and baby agrees too!)


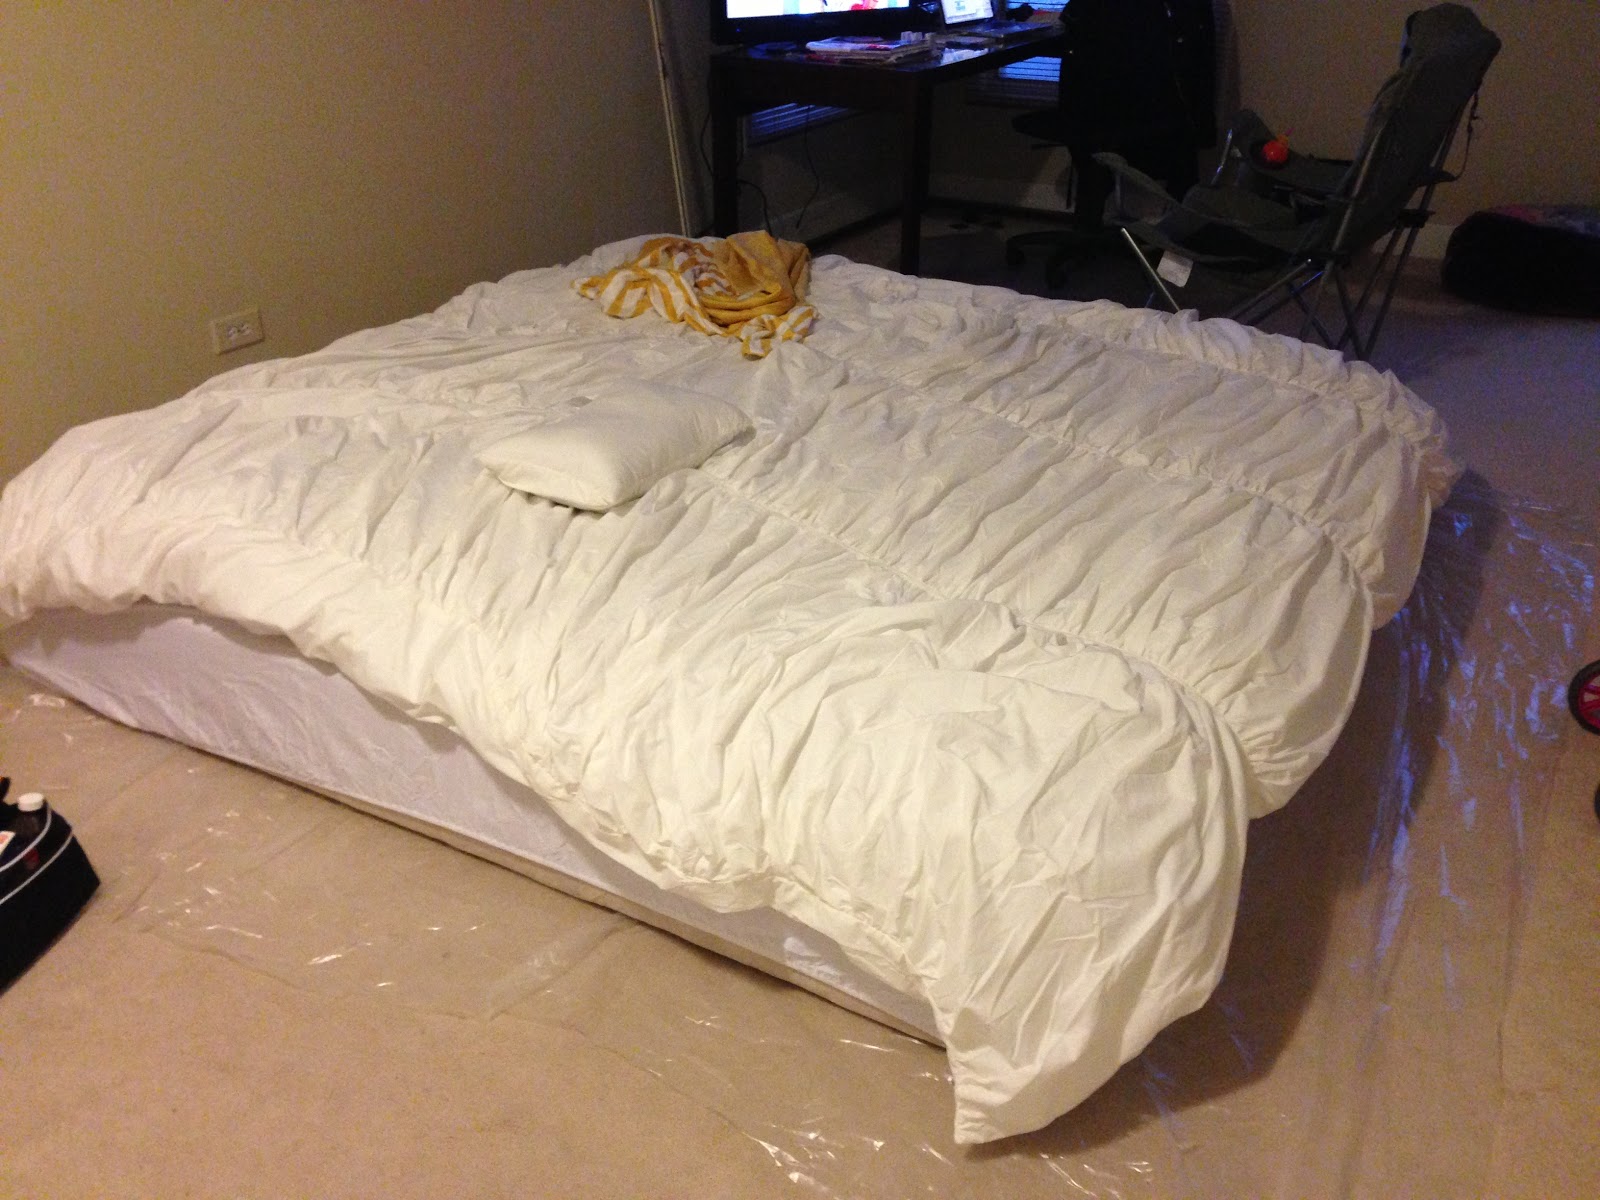
Shipping was also not only free, but it literally shipped within a couple days of ordering and arrived at our doorstep in less than a week! Pretty amazing in my book.  It arrived all bundled up (top left) and as soon as unrolled (top right) it took shape pretty quickly.  There was a bit of a chemical-y factory smell but after airing out a day, it was much less noticeable to non-existent.  By the 2nd day, I even prettied it up with my new sheets, my new "calm" aromatherapy down comforter (lavender, chamomile, and sage infused down comforter, to be exact--gimmicky? yes. but again with those good reviews), and my gorgeous new duvet set (ruched and cozy. love!).  And check out the stock photo, it even has a similar upholstered bed frame that I ordered (I'm just realizing this now! Crazy!)

Our love was meant to be!
So, this goes to say that this again threw our ever-shrinking budget for a loop, but I am also glad to say that not only was I able to use bountiful of coupons, but also a butt-load of Kohl's cash. 

Quick and exciting king-sized bedroom budget breakdown:  
Sale of old Master Bedroom set = $1000
Overstock.com Mattress and Bed (with $100 off coupon): 1295.65
Duvet set: Orig. price = 161.99,  I paid (with coupon and tax) = 114.74
Down Comforter: Orig. price= 229.99, I paid (with kohl's cash and coupon), I paid = 80.74

Grand Total = $491.13 (BAM!)

If that's not a deal for sleep heaven, I don't know what is! (thank you, thank you!)  Gotta love online shopping!

Anyhoos, this brings me to our next Master bedroom project (and hopefully an easy peasy one).  Since we've sold our vanity dresser (along with 2 side tables and a queen bed), we need to find a solution for the new bedroom.  So we thought, why not build a built-in dresser complete with an entertainment center for our TV (yes, we are a bedroom TV couple).  How perfect is it that one of the two closets in our bedroom sits right at the foot of our new plush king-sized bed!  With my gears turning, I quickly devised a little built in dresser/storage/entertainment center with Ikea's Pax planner software (free on the Ikea site).  I can already imagine it with pretty trim and glass pulls.  sigh...  The middle section (39" across) would house our cute 32" flatscreen perfectly with room to spare!  We'll just have to wait and see if there is any wiggle room for the budget at the moment (but I love to plan ahead) 


OK, and last but not the least, Steve had a chance to do some scavenger hunting in the attic just to see what the heck is up there and found this lonely robot all on its lonesome.  Yay for roombas!  How cool would it be if the thing still works, so we're giving her a charge and hopefully letting her fulfill her dirt-sucking destiny in the near future.  Here's hoping!

Robot Apocalypse!

Anyway, if you made it this far down, thanks for reading.  Hopefully, I'll be a little bit more proactive in the next few days (tomorrow supposedly being our contractor's last day.. a couple days late) and take more detailed pics of actual construction.  Should be nice and pretty tomorrow with all the paint going up downstairs (ooh, ahh) So stay tuned!

If you guys want to read the rest of this *exciting* remodeling series, CLICK HERE!


Follow This Blog

Monday, January 28, 2013

Day 6-7: Weekend warriors

Ok, so this isn't much of a post due to the lack of info and photos from Friday and Saturday.  My family and I took a trip up to Michigan for a whirlwind weekend to celebrate my 2 year old's birthday with family. 

Aside from Steve making a quick stop to make some changes in electrical and extending the half wall a couple more inches (cabinets altogether on that wall should be 91", half wall was originally made to be 89.5"), there really isn't much progress being made to the house.

BUT to make this a somewhat worthy read, I did take a screenshot of a neat 3D rendering of what the open concept living/dining/family room might look like when it's all done.  Ta Da!


I used an iPad app called Home Design 3D.  There is a very limited trial version for free or purchase the app for a bargain basement price of $6.99.  I ended up buying this app, but if I remember correctly, the biggest difference between the trial and paid version is that you can save your designs with the purchased version.  So if you just want to get ideas, it's worth a try (or maybe just take screenshots for your own records if you really don't want to purchase the app)

Anyway, the interesting part is that I actually created this 3D rendering waaaay before we started construction and even before we've even picked out contractors.  The actual (almost) finished design is looking pretty much spot on to how I "3D" designed it, which was somewhat of a surprise after we opened the saved design a few weeks later.  Neat, eh?

After we returned from Michigan on Sunday, we did manage to stop by the house (after battling icy winterstorm Khan -- yes, winterstorms also now have names), to check out what's been going on while we were gone.

Looks like they've finished drywall/mudding the vent soffits in the family room as well as extended the half wall.  Overall some progress, but there was a little bit of miscommunication from what we can see since we didn't want this weird "tetris" L shaped soffit piece in the corner of the opening in the family room, so we're going to ask them to extended the top part of the soffit all the way across the header for a little uniformity (the picture is a little cutoff on the below left, sorry).


 They've also covered up the vent on the kitchen side with a 4" soffit overhang (and this one extended all the way across the header) so we are happy with this one.


And that's about it folks, at least from what we can see.  OH, Steve did spy that the new electrical boxes above the half wall for our pendant lighting and also more electrical outlets, etc. have been moved/added around the kitchen which is pretty awesome too.  The previous owners had some really interesting ideas of working around electrical for the oven and fridge-- as in using extension cords coming from the basement and other outlets to connect to power.  Pretty crafty, but not at all the way it should be.  So yay for the new outlets.

To end this post on a sweet weekend note, below are just a few photos from our 2 year old's sweeter than sweet cupcake party.  My tooth aches just looking at the photos.


Hope you guys had a great weekend.  And stayed warm too!

If you guys want to read the rest of this *exciting* remodeling series, CLICK HERE!


Follow This Blog

Friday, January 25, 2013

Day 5: cupcakes and drywall

Yesterday was our daughter's actual 2nd birthday, so Steve and I took a break from all things construction and focused on Olive's day.  So this post is going to be pretty light on details (sorry!)

Mmm. birthday treats.

But we did stop by the house after the day is done to check out the progress.  Day 5 was mostly drywall and what looks to be the half wall for our peninsula.  Ideally, there would be no half wall here but to follow codes we had to place outlets every 2 feet on this wall.  The wall also allowed us to keep the existing vent in the same area and also keep the really cool original scalloped vent grate (I'll have to take a picture of it another time)

I see you!

We decided to see if my Black Friday globe pendant lighting finds would look good over this area by using Steve's strong manly arms to hold up the pendants in place.  It took a little bit of imagination to picture it above the counter, but I think we could make it work.  It's also hard to see with the plastic around the globes (the globes are crystal clear and should give the illusion of a smaller light fixture), but  I'm really hoping they are not going to be too big.  I guess some surprises will remain until it's all done.


Vanna, show us those globes...


The new opening into the family room has also been drywalled (at least from the dining room side).  They're still creating a few small soffits on the family room side to accommodate the new vent placements.  Although we had to sacrifice a completely open wall and add 2 ft. of walls on each side, this is a much better solution than having the old vents right smack in the middle of the room (even though I still like the half wall/column idea that I had.)  And I'm already picturing furniture placement in the family room, but I'm still at a loss until we actually have them here.  (so much for creativity)


So other than new strategically placed outlets and electrical boxes for the pendant lighting above the sink, this is about all we could see for Day 5's progress.  Unfortunately, they didn't quite finish today like we optimistically thought, but they'll be working through until Saturday in our absence (Today is going to be a day full of doctor's appointments then finally doing the long drive to Michigan to see family and celebrate Olive's birthday with even more cupcakes for the weekend).   

Hopefully, Peter, our contractor extraordinaire, will take lovely pictures for us to blog, but i'm not holding my breath.  So Day 6 and 7 will just have to be some write-ups and we'll take more pics when we get back from the weekend.  I'm kind of sad that we won't be there for the last day of work, the JP6 crew has been a real pleasure to work with -- courteous, efficient, and very easy to work with in general-- it's sad that we can't be there to thank them in person when all is said and done.  (I think Steve even made a few friends while chatting them up as they worked.. or found him a nuisance..)  It's weird, but it's been nice having a whole team working on the house day in and day out.  I think it's that feeling that things are moving along, but it'll be even nicer when things are actually done so I'm not hurting that bad.   

But if you guys are looking to remodel and renovate in the Chicagoland area, I recommend giving these guys a call.  As a company,  JP6 Enterprise Handyman Services LLC, are just starting up, but Peter and his crew are very experienced and knowledgeable coming from an extensive background of working for a different construction company.  So the expertise is there, they are competitively priced, work well and pretty fast too.  They were able to came up with solutions right away on the few problems we ran into (vents, ducts, electrical) and didn't even break a sweat.  I'm sure we'll be giving them a call for any other future projects.  If you give them a call, tell them we, the Jermans, sent you! :)

So anyway, enough gushing.  We'll try and stop by today on our way to Michigan to check out the progress, and to blog some more photos.  In the meantime, hope y'all have a Happy Friday!


If you guys want to read the rest of this *exciting* remodeling series, CLICK HERE!

Follow This Blog

Thursday, January 24, 2013

Day 4: House of Pane(s)

And now all I can hear in my head is the sound of bagpipes and the intro to House of Pain's  "Jump Around".. but I digress...

First things first...  Today is my sweet baby Olive's 2nd birthday!  I just want to wish the little love of my life a very Happy Birthday in the blogosphere universe.  She is my everything and has given us the best two years of our lives, Happy Birthday baby! ( i love you, i love you, I LOVE YOUUU!)

Best 2 year old EVER!! (Sorry other moms)
Ok, on to Day 4's recap.  It was all sorts of cold on Wednesday and that harsh Chicago weather was in full effect.  Well, at least that's how I imagined it with the old windows being ripped out to bring in all that frigid air flowing freely inside the house.  I confess, I was once again AWOL, on Olive duty, and trying to manage my day job (I'm on deadline!) at our old house.  So Steve was solo at the helm with the JP6 crew and the window guys yesterday.

This was pretty exciting, considering our first energy bill at the new house (15 days worth of energy, to be exact) is way more expensive than what we normally pay at our other house in a month.  And we don't even live there yet!

Just throwing money out the wide open window..
So the promise of energy savings with the new windows, and the added future warmth and comfort is a definite welcome addition to our new home.  Today's chilly forecast only made it all that much more apparent how necessary this was (well, it didn't help that we were sans windows while the new ones were being prepped for install).  

Brrrrr....
We went with a local company, Chicago Window Pros, after the company's president, Dan, actually paid us a visit to inform us of their products.  I think we got a pretty good deal on these too, we placed our order right before the end of last year, and they threw in all the fancy shmancy upgrades for each window GRATIS! -- Neat glass technology that cleans itself with a little sun and a little rain, Low E 366 feature, which is the ultimate performance glass and a good balance of solar control and high visibility, the list goes on and on (check out their site)
more fancy window number talk.. 
We ended up with 13 new single hung R7000 windows (one horizontal slider and an oversized one for the front).  The windows in the additions were fairly new and didn't need replacing, so that was nice.   Our budget took a little bit of a hit and ended up costing us around (drumroll please) $5400!  Now, 5 grand isn't chump change to us (in fact, it is one of our pricier expense to date), but from what we've heard from friends and family, for 13 upgraded windows, that my friend, isn't too bad... right??  (thoughts? honest opinions?)

Anyway, here are some pics of the new windows.


All laid out
Installed: lookin' good
The window guys were even
nice enough to caulk
our old leaded window
to get rid of that nasty draft..
The new house of pane(s). har har
Hooray for toasty and warm! The rest of the house was also going through a warmer transformation as the HVACs were being moved and replaced strategically throughout the house.  We are just that much closer to a more comfortable indoor climate.


this will go under the peninsula,
and out of the toe kick..
They did a pretty good job keeping it inconspicuously close to the wall and hopefully incognito when drywall goes up.  So before we know it they'll go undetected (as opposed to the previous placement right smack in the middle of everything) and it'll seem like the house is being heated (and cooled) by magic!  We'll know they're there, but it'll be our little secret.  
Sleek and narrow vents. Sexy!
And since we are on an energy saving kick, we busted out another fun toy to help with keeping our bills down.  With our Christmas giftcards in hand, we went into Lowe's and bought ourselves a new thermostat.  But not just any thermostat, mind you, we bought the Nest. Ok, it's hard to get excited over a thermostat, but after Steve went on and on about it, I had to do my own research and this thing is pretty neat.  It learns your patterns (big brother??) and learns the temperature according to your lifestyle. Holy smart robot, batman! Not only that, but you can control it remotely with your smartphone and tablet so if you are away for extended periods, turn that sh*t down and save yourself some $$$.  Exciting!

The Eye of Sauron's energy saving cousin.

Of course, the nest, to function optimally, need to be in an area where it can detect daily motion.  And with our current thermostat facing the formal living room (we really are not that formal and don't plan on hanging in the front room that often), we had to switch up the wires to the other side.  There goes another hole to patch, oy vey!
Switcheroo: thermostat edition

We also did a little more switcheroo to accommodate the switches in the now missing walls. So here's another hole we've gained, but only to be patched with a switch plate (by the pros this time since it's in the quote, whew!)


All in all, Day 4 was a success and with mostly just drywall on Day 5, the end may be in sight for this construction.  Of course that's when all the kitchen fun begins and our DIY skillz will be tested.

What a week it's been.. but that light at the end of the tunnel is getting closer.  Speaking of the end, our budget is also getting close to the bottom of our not-so-deep pockets, as demonstrated by the receipt despot below.  Oops!

You bought what!!??
If you guys want to read the rest of this *exciting* remodeling series, CLICK HERE!

Follow This Blog

Wednesday, January 23, 2013

Day 3: We've got brick!

“Architecture starts when you carefully put two bricks together.  There it begins.”
~Ludwig Mies Van der Rohe
I couldn't quite make it to the house on Day 3 (I had some work to do that needed the "internets"), so I had my trusty partner in crime, Steve, take lots of pics for me on the job site.  It was business as usual at the house (so I was told); loud noises, dust and debris, and a whole lot of progress.  But first I wanted to talk about MY favorite part of Day 3 (as I've also mentioned in Day 2): the brick reveal..

BEFORE: Disguised in drywall
AFTER: Brick charm galore!
Just look at how it instantly transforms the room(s).   The ol' brick chimney was covered in dirt and soot, but Steve gave it a nice quick turn with the vacuum and it quickly became the belle of the ball. Don't you think that the exposed brick just gives the place instant charm?  I especially love that the brick itself is so full of character, not quite perfect, but every misshapen flaw suggests the years it has withstood. And this is exactly why we love an old house. *swoon*

We'll give it a nice scrub, with some dish soap and salt as I've researched online, and seal it up to protect and bring out those nice antique Old Chicago brick colors.  I just can't wait to stare at it day in and day out when we move in.

Ok, I could go on and on about the brick like a lovesick teenager, but there were other things going on in the house too.  Another header was placed between the dining room and the family room, finally giving us the open sight lines we've been hoping for.  It really is a wonderful feeling, knowing that you've made your house your own, when we first bought the house, I was afraid that I'd have a lot of buyer's remorse, 1) because I've never lived in an old house and 2) because new houses still feel like it has the ghosts of the previous owners and I thought I might never feel like it was ours.   But with all these changes we're making, we've made it work for our family and really make it our own.   Just the idea of being able to see my toddler (and guests) in the other adjoined rooms, playing or watching tv, from the kitchen really is something I've been wanting for a long time.  


View from the living room

from the kitchen
from the family room

I haven't seen this completely open space myself in person aside from the small glimpses in the first few days of construction (I'll head back to the site on Day 5 after windows, hvac, and internet has been installed), but this just gets me more excited about our moving day. 

In other news, our electrical being old as dirt has finally been taken care of (Peter, our contractor, is also a skilled electrician!)  I'm not exactly sure who did all of the MacGyver'ing in this old house, but the electrical was a huge mess.   Peter was able to ease our minds and route, re-route, and update the old scary tangled mess that powered the house.  So thankful for that!

Electric nightmare
Crafty genius
OH, and in non-construction related news, we also met up with a couple friends of ours who are interested in renting our old house to shore up some paperwork.  We talked over dinner at our favorite Mexican joint, Friaco's (mmm mmm mmm), the timing could not be any more perfect and this pairing is just meant to be.  

A little background story.  When we first listed our old house in December of 2011, I posted a link to the listing on good ol' social media (Facebook), in hopes to drum up more business, a friend of ours made a casual comment looking for a rental but not for another couple of years.  Jump ahead 2 years later, and said friend is still looking and we are now renting.  It was serendipity!  (Alex and Angela, if you guys ever read this post.. thanks a million!)

So other than that, Day 3 went smoothly, and was a pretty light day, in comparison to the first 2.  We even had time to stop at our local Lowe's to browse their lighting department.  We found these 2 ceiling fans below.  Totally different styles, but both appeal to our senses.  Do any of these strike your fancy and if you had to choose (for us, of course) which would you like for the family room.  
What do you guys think?

Dual mini fans
mini fan within a drum light

If you guys want to read the rest of this *exciting* remodeling series, CLICK HERE!

Follow This Blog