After going through a long list of contractor bids and a few other delays, the day has finally come where we get a glimpse of what our open concept house dream might look like. I stressed and lost sleep over this. After all, old house, old problems, you just never know what might happen. In the end we were bound and determined to have a house that fits our lifestyle, even if it means tearing down a few walls.
I know it seems odd to say how much I love old houses, then go right ahead and tear it up. I feel a little guilty, but that 70's kitchen remodel on our 1909 house didn't quite fit anyways. Technically we are tearing up a few walls to a non-original addition, with the exception of the kitchen/dining room wall. Let's just say, I can still sleep at night.
With that said, we'll attempt to keep some charming details intact (like the beautiful vent grates and original trim) and re work them into the new design. I guess here's where we can get creative.
So the family room/dining/kitchen combo was in desperate need of opening up (hence the open concept). Each room was cloaked in darkness, isolated from each other (and not to mention covered in 90's-tastic pear wallpaper with matching drapes) making us crave the light. After a few inspections and talking over with some contractors, the addition of the central venting systems (which we are grateful for) sometime in the 70's couldn't quite get us that whole open concept completely. Enter these charming half walls.
Yes, functional in separating the rooms, yet allowing the sight lines to continue. Weirdly enough, I was kinda glad we ran into those venting issues, because I am completely in love with these half-walls with columns. We may just even do a built in!
So that was the plan. And now to make it happen.
Here's a few before shots..
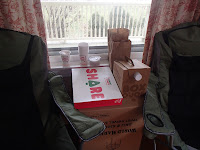
On to the fun stuff. First off, a little morning box o' joe and a dozen donuts were in order to get on our contractor's good side. A little morning motivation never hurts ;)
After getting our guys fueled up on caffeine and sugar, off they went. And those walls were ready for some hurtin'.
Unfortunately, we found a few disturbing discoveries. It seems that there were no additional supports added to the ceiling for the 2nd floor addition. I guess this would explain the huge settling cracks in the master bedroom, how scary! The picture below shows the studs resting on a doorway header, but it was actually floating somehow and not even touching the header. I am quite confused at this point. It seems that the skinny original 2x4 studs are holding up the entire 2nd floor addition. No new studs were added on the addition side. Is this normal??
Clearly this was not up to code, but I guess they just used some good wood back in the day that it was strong enough to hold up for awhile. Either way, we are doing it right this time around and adding the appropriate header support, just so we can rest a little bit easier.
After all was said and done, just look at how much light we were able to bring into the dining room. And we're not even all the way through yet! Overall, day 1 was a success in my book. I couldn't be more excited for the possibilities of our new open living concept.
AFTER: Light and bright
BEFORE: Dark and dingy
Day 2 will start on Monday. After all Sunday is a day of rest.
Do you guys enjoy an open concept living floor plan?
If you guys want to read the rest of this *exciting* remodeling series, CLICK HERE!


No comments:
Post a Comment